My favorite little niece, Ella, or as we like to call her, Ella Bean (read why
here) had her Very 1st Birthday on February 10th. We celebrated with a Princess themed party at her house and let me tell you...Pink was definitely the name of the game! She is a girl all the way...no doubt about it, that Bean is her mother's daughter and her Auntie's niece! The party was on February 12th and I have been waiting (im)patiently to post about these adorable headbands and flowers I made her. Along with her very own bow holder, which I got the idea from my friend April over at
her blog. April is REALLY talented, very creative, and one of the nicest people I know! She is amazing with a sewing machine and comes up with great ideas for tons of different types of projects. Check out her blog if you haven't already..you'll be hooked. She has been very busy with her two children, so not many posts lately, but from what I understand she's going to be back in the blog world soon, starting a new blog with a friend.
Enjoy all the deets about these projects, feel free to copy exactly
and make your own or tweak it the way you would like, but either way share with me if you wouldn't mind, if you end up making any of the projects!
Project #1: removable daisy flowers for a stretchy headband
I bought this bouquet of flowers, it happened to have pink, yellow, and red! SCORE!! And it was half off...I believe I paid $5.99 for the bunch...that's a lot of flowers for the little princess
I decided to make a pink and yellow flower, so I disassembled the two flowers and tossed the front piece and back piece in the trash..no need to keep the ugly parts
I then alternated the pink and yellow flower "petals" using hot glue in between each layer
This is what it looked like at that point
Since it needed some bling for the bean and a more finished look for my taste, I decided to add a little jewel in the center
Then you need to take an alligator clip (these can be found by the beads at Hobby Lobby) and cover it in ribbon. Covering the clip give the flower something to adhere to. You simply take some thin ribbon (which I had on hand) run a line of hot glue down the middle, lay the clip on it and ta-da!
As you can see here, the ribbon covers just a portion of the clip on the other side, just to give it a finished look. (Yes, this is a different flower. I made her a red one too, since Valentine's Day was coming up...I thought for sure she'd have something to match it in her wardrobe!)
And she did! See?? That's right, pink is not the only color this girl can pull off.
She's pretty cute, huh? Yeah, we know!
*Notice the stretchy headband? If you are not able to make them (which I'm not because I have yet to figure out how to crochet...even with an instruction book) you can purchase them near the headband/flower/bling department at Hobby Lobby. They actually have the flowers all made, but they cost about $4 a piece, instead of making them yourself, for much less and for more satisfaction.
Project #2: making a flower embellishment for a headband (not removable)
First, cut two of these shapes out of felt, I guess you can call them leaf shapes? Mine were about 5 inches long, 3 inches wide at the widest point
Then take 2 of these types of flowers, sorry, don't know what kind they are, so I can't tell you!
(This is a great tutorial, huh?)
Then, much like the last project, take the petal layers apart and discard the back piece.
Separate into small, medium, and large piles.
Next, you just fold the layers in half and start hot gluing them down. I started with the smallest layers and used 2 of them, then moved to the medium size layers and used 4 or 5 of them, and finally did 2 large in the middle of the felt shape. Once you glue the large pieces down, you go back to the medium and then the small again. For the final petal layer, you fold a small size in half, then half again and glue that down on the point. (Sorry I don't have a picture of this, but it's pretty easy.)
Once my last layer was glued on, I added another bit of "bling" to the piece. Again, no picture, but it was just placed over the spot where you could see the hot glue spot on the last layer.
Finally, you "sandwich" (that's a technical term) the headband between the two pieces of felt and glue them together, with a lot of glue. And you are done!
Here's the birthday girl showing off her headband:) No, she wasn't playing on her new toys all day (notice she's now in her PJ's) she did take a break to nap, eat, and have her diaper changed...do you think she's going to be a race car driver when she grows up? Or maybe she'll love to ride on the lawnmower just as much as her daddy!!
Project #3: the bow holder (thanks again to
April for posting about her bow holder and giving me this idea!)
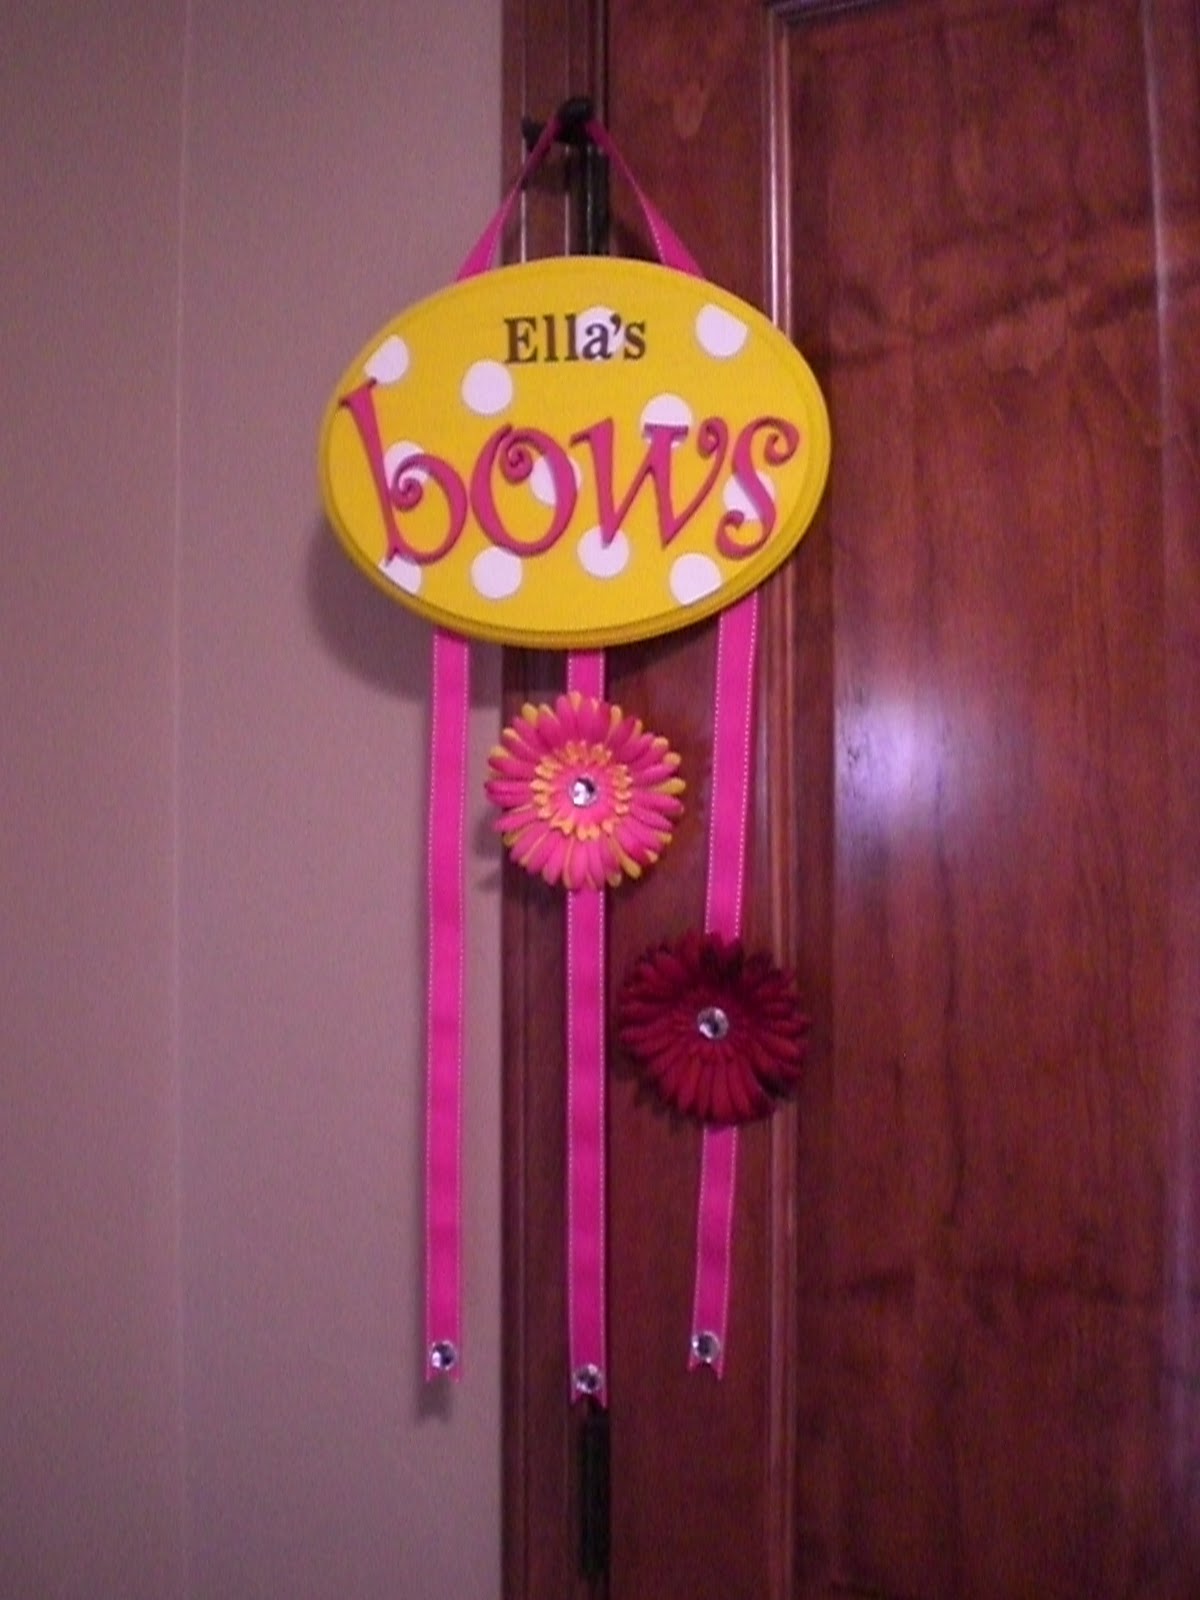
Start with an oval shape piece of wood from Hobby Lobby (or whatever shape you love)
Paint it whichever color you prefer...I picked yellow, pink, and white for my theme
Add some fun polka dots using a circular shaped sponge:)
Paint your curly q letters the color of your choice (I chose pink and these are also from Hobby Lobby)
Adhere the letter to the oval base using wood glue or super glue
Add a "handle" at the top for hanging on a wall
I found this ribbon at Michael's...on sale and used my 40% off coupon!
After I added the handle, my husband thought it was missing something near the top so he came up with the idea to put her name at the top using some chipboard letters I had in my scrapbooking supplies:)
Very creative is he!
Add a few strips of ribbon to the back of the oval (or other shape) near the bottom
Add some bling to the bottom of the ribbon...to weigh them down a bit and to please my bling-lovin'-self:)
And there you have it...clip the flowers on and you are all ready to wrap this baby and give it to your very own deserving princess!!