As I mentioned, or maybe I didn't,or maybe I did and you didn't read it, I want to start blogging about more interesting topics:)
Not that my son, my dogs, and my husband aren't entertaining enough...I just feel like I want to write about more. Sure, I love to write about said son, dogs, and hubby, but they really only give me so much to work with and I'd like to appeal to more readers. So, here goes nothing!
I saw a project similar to the one I'm about to show you here. It's a blog I follow and I love reading about what Sarah has come up with for ideas around the house.
So, I got the letters, paint, brushes, mod podge, scrapbook paper, and ribbon from Hobby Lobby.
(No, I didn't have any craft brushes, paint, or mod podge at home. I'm just starting to be crafty, so I need to build up my supply drawer!) This was actually the very first time I used Mod Podge and I really liked how it worked! I'll be sure to use it again on something, sometime, somewhere:)
So here is the super easy, project...trust me, it IS really easy, my sister (who doesn't craft much at all did it, so I know you can too...sorry Sis!!)


So here is the super easy, project...trust me, it IS really easy, my sister (who doesn't craft much at all did it, so I know you can too...sorry Sis!!)

Step 1: paint the sides and edges of the letters and hearts

Step 2: Let the paint dry completely..not hard to do, it dries fast

Step 3: Pick out the style of paper you would like and put it in the order you want it to be on the letters and hearts (one heart goes in the front of the word "love" and one at the end)
Step 4: (no picture) trace the letters onto the paper and cut them out

Step 5: Using Mod Podge as a base, apply the paper to the letters

Here's a picture of my new best friend :) Why I didn't find him sooner, we will never know.
I call the MP a him since he's so strong, he can hold so many things together for me:)

Step 6: Put "him" over the letters and hearts a few times to coat very well and give it a nice glossy finish. I think I did three coats total and I like the finish. Just cover until your hearts content.
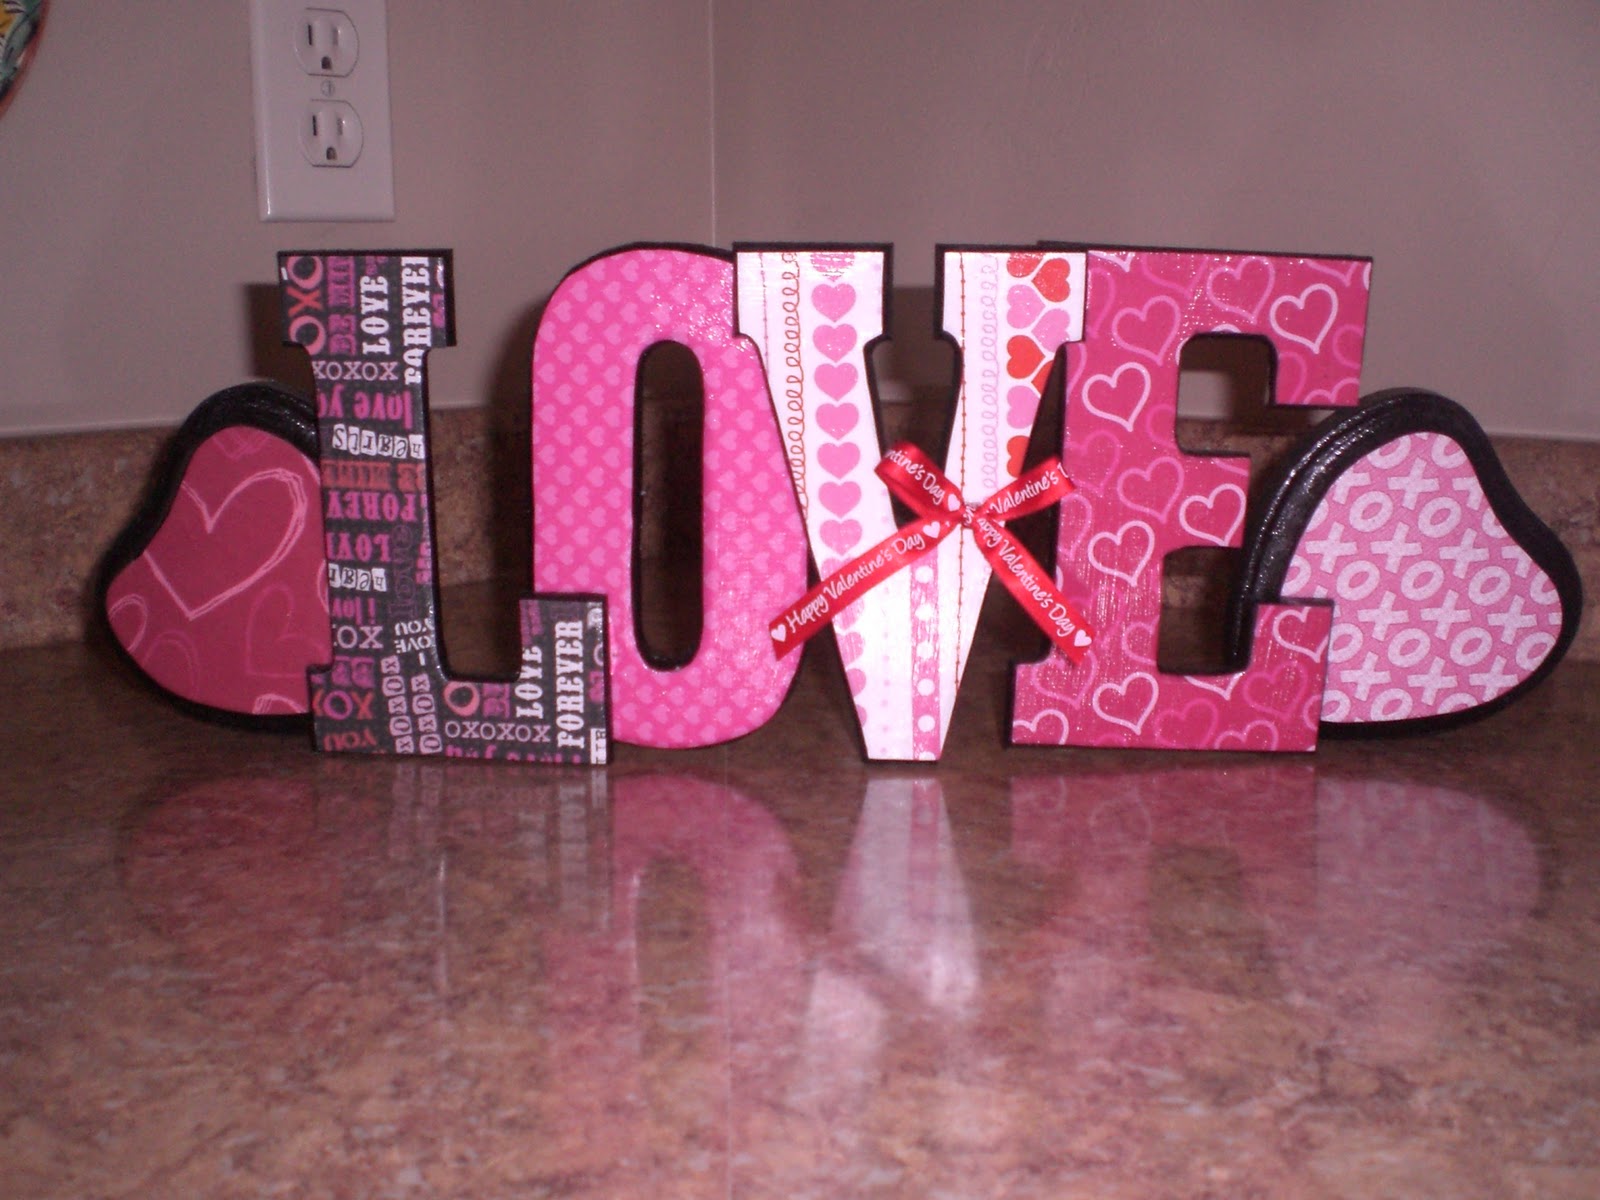
Step 7: Glue the letters together using hot glue, and then embellish...I just added a simple little bow with my Valentine ribbon, you can do as little or as much as you'd like!
Cost for this project:
Letters: $.99 a piece (4 total)
Hearts: $.50 a piece (2 total)
Paper: $.29 a piece (3 total)
More paper: $.59 a piece (3 total)
Ribbon: $.50 (it was half off for the holiday)
Paint: $.67
Brushes: $.99
Mod Podge: $4.47
__________________________________
Grand total: $14.23
However, I will be using the Mod Podge, Paint, and Brushes again, so if I would have had them or if I don't "count" them for this project...I would have only spent $8.10!!! So, let's just say I spent $8.10 on these great Love Letters:)
Thanks again Sarah over at Scissors and a Whisk for the great idea!
I wanted to post this even though it's after Valentine's Day because I'm thinking I might make them for more holidays...USA for 4th of July, TREATS for Halloween, THANKS for Thanksgiving, SANTA for Christmas. The possibilites are endless.
That sounds like one FABULOUS afternoon (or nap time lol)- so much cute stuff!!!
ReplyDelete